How to create email notifications
To start working with the notifications, navigate to Appointments > Notifications > Add New Notification.
Let’s see how you can schedule them for a specific time and condition:
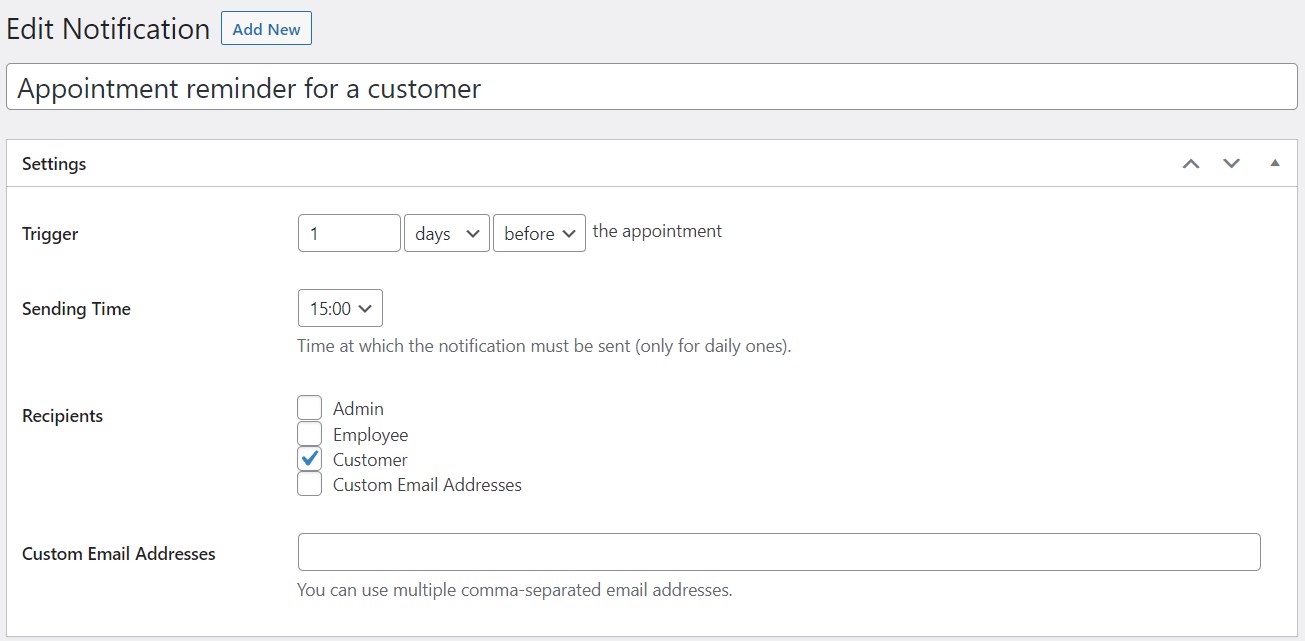
- Add an email notification title so that your admin staff can remember what it’s about.
- At what condition this notification must be sent: in how many days or hours before / after the appointment the email must arrive at the client’s email address.
- For those you choose days as a condition, set the exact sending time.
It’s important to highlight here that notifications won’t be sent for bookings that don’t meet the requirements of the conditions you set.
For example: if an appointment is scheduled for tomorrow and the notification sending time for the service in this booking is ‘in 3 days before the appointment’, such a reminder won’t be sent.
So if you have, say, past bookings that contain appointments scheduled for tomorrow, and the notification sending time for them is ‘in 2 days before the appointment’, such a notification email won’t be sent.
You must also choose who is the receiver: Admin, Employee, Customer, Custom Email Addresses. Don’t forget to check the box for Custom Email Addresses if you list those in the appropriate field!
That means that the notification sending condition you create is the same for all services, but it might differ by the receiver and the service-specific information inside the email.
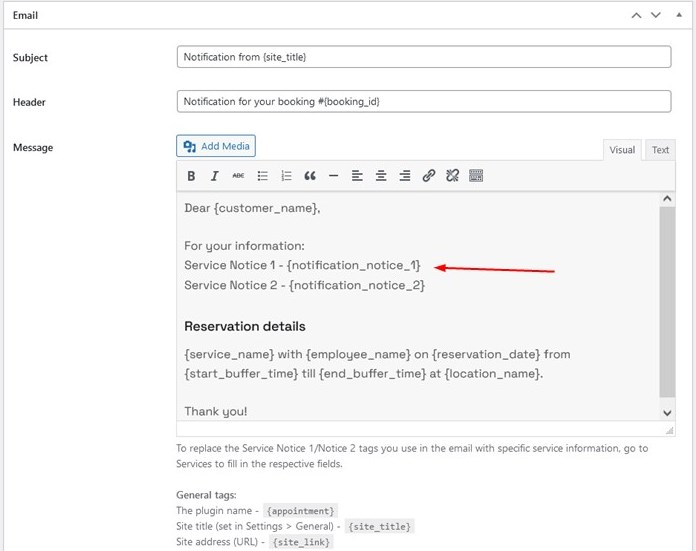
You’ll notice macros below the email template that will help you add information you want clients to see in this email template, for example, services booked or the amount paid.
These macros will be automatically replaced with the individual booking information.
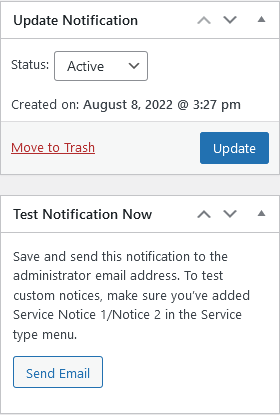
We also provide an easy way to test how these notifications work.
Just click on the Test Notification Now box and the test notification email will be sent about a random confirmed booking to the email address you stated as an admin one in the settings (Settings > Emails > Administrator Email).
If you go to an individual service, you’ll see a new dedicated section for “Notification Notices” (“Notification notice 1” and “Notification notice 2”).
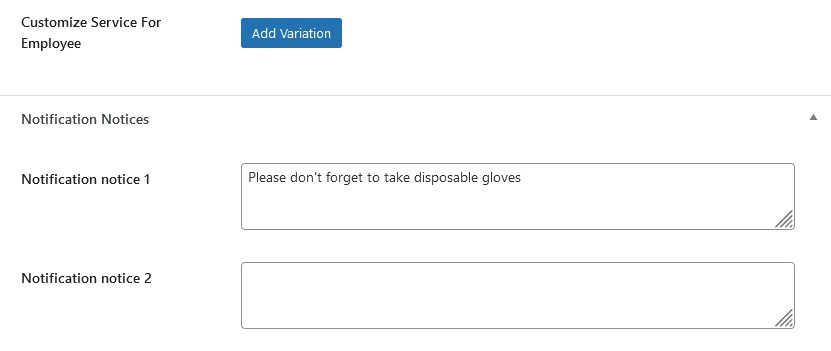
There are two of them to give you more options for categorizing information in the email notifications.
For example, your default email template might contain one line about ‘Required equipment’, and another one ‘Important Information’, while you can make this information different depending on the service.
Of course, you can use just one field or don’t use them at all for services that don’t require them.
It’s super easy to add them, though. As a step 1., just scroll down to that section and specify the Notification Notices, meaning, add the text.
As a step 2., make sure to add tags for the notification notices to the email template. Navigate to Appointments > Notifications > choose the needed notification > go to Email template > insert the needed macros for notices where needed.
You can replace the default ‘Notification notice’ phrase with your own text:
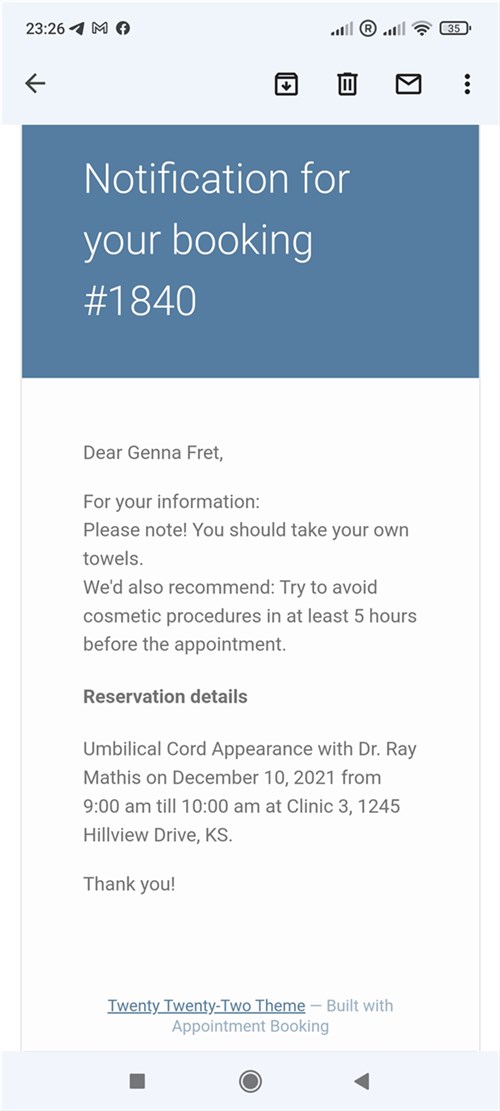
This will automate the process of sending email notifications with the service-wise custom information.
How notifications work
One appointment = one service booked, but there might be many in one booking. Automated notifications will be sent service/appointment-wise.
To stay updated on the information on how notifications work, you can go to all notifications and see updates on the executions.
Cron executions are checks performed every 15 minutes in search for the new booked services and sending relevant information you added via notices.
By the number of notifications, you’ll see how Cron works in real time, i.e. how many notifications were sent or whether they were at all sent.

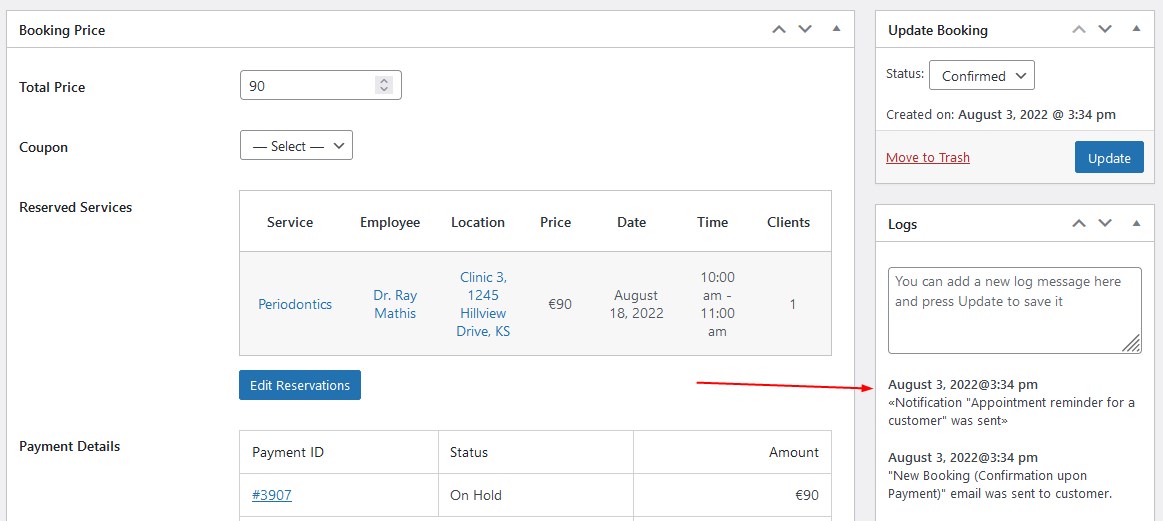
If an email notification was sent for the specific service, you can see this information recorded in the booking information with the «Notification “%notificaton title%” was sent» data in the logs.
And that’s it! You can now automate any types of email reminders and notifications in addition to the default booking confirmation or cancellation emails. To get this flexibility of sending emails before and after the appointment, make sure to update your Appointment Booking WordPress plugin to the version 1.13.0.
The post Send Appointment Reminders Automatically since Version 1.13.0 appeared first on MotoPress.
