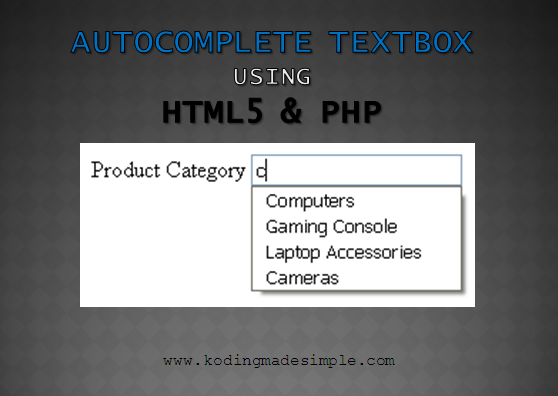
Autosuggest Textbox is a cool technique to enhance user experience in websites. It's a google like search box which pops up suggestions while you type and lets you choose the word(s) without typing it completely. Usually this feature requires third party tools like jquery plug-ins to implement but thanks to HTML5, you can do it with plain html and php alone. In this tutorial, I'm going to show you, how easy it is to integrate HTML5 auto complete textbox from database using PHP and MySQL.
Autocomplete Textbox from Database using HTML5 and PHP
The HTML5 DATALIST element adds up autocomplete feature to ordinary textboxes and it takes up several options similar to SELECT element. To implement auto suggest from database, we should fetch the data and populate it to the datalist options. Finally integrate this datalist to a textbox element and we are done. Let's see how to do it in php and mysql.
Step-1: Connect to MySQL Database in PHP
First establish the connection to mysql database in php.
<?php
//connect to mysql database
$connection = mysqli_connect("localhost","username","password","store") or die("Error " . mysqli_error($connection));
?>
Step-2: Fetch the Required Data from MySQL Table
Now fetch the required mysql table field data from database. Here I wish to select the list of category names from the 'category' table.
<?php
//fetch data from database
$sql = "select cname from category";
$result = mysqli_query($connection, $sql) or die("Error " . mysqli_error($connection));
?>
Step-3: Create Datalist with MySQL Data
Next create a datalist element, loop through the mysql resultset and add the category names one by one to the datalist options.
<datalist id="categoryname">
    <?php while($row = mysqli_fetch_array($result)) { ?>
        <option value="<?php echo $row['cname']; ?>"><?php echo $row['cname']; ?></option>
    <?php } ?>
</datalist>
Step-4: Integrate Datalist with a Textbox
Next create an input element and set its LIST attribute to datalist's ID.
<input type="text" id="pcategory" autocomplete="off" list="categoryname">
It simply binds the textbox with the datalist OPTIONS and suitable suggestions pops up when the user type something in the box. We also used autocomplete = "off" to disable the browser's default autocomplete feature for proper functioning of our own autosuggest feature.
Step-5: Close the Database Connection
Finally close the mysql database connection we have established earlier.
<?php mysqli_close($connection); ?>
That's it. Now go and check it in your browser and see the auto complete textbox works like a charm (Only in HTML5 supported browsers).
 |
| Autocomplete Textbox in HTML5 Example |
Complete Code for HTML5 Autocomplete Textbox
<?php
//connect to mysql database
$connection = mysqli_connect("localhost","username","password","store") or die("Error " . mysqli_error($connection));

//fetch data from database
$sql = "select cname from category";
$result = mysqli_query($connection, $sql) or die("Error " . mysqli_error($connection));
?>
<!DOCTYPE html>
<html>
<head>
    <title>Autocomplete Textbox in HTML5 PHP and MySQL</title>
</head>
<body>
    <label for="pcategory">Product Category</label>
    <input type="text" list="categoryname" autocomplete="off" id="pcategory">
    <datalist id="categoryname">
        <?php while($row = mysqli_fetch_array($result)) { ?>
            <option value="<?php echo $row['cname']; ?>"><?php echo $row['cname']; ?></option>
        <?php } ?>
    </datalist>
    <?php mysqli_close($connection); ?>
</body>
</html>
Also Read: How to Insert JSON File into MySQL Database using PHP
Don't Miss: How to Insert CSV File into MySQL Database using PHP
And that was all about implementing autocomplete textbox in html5 and php. If you want the auto complete with more styling options, then using jQuery UI plug-in is the best option. Read this tutorial to learn about using jquery ui for autocomplete textbox in php and mysql.

